As an Amazon Associate I earn from qualifying purchases.
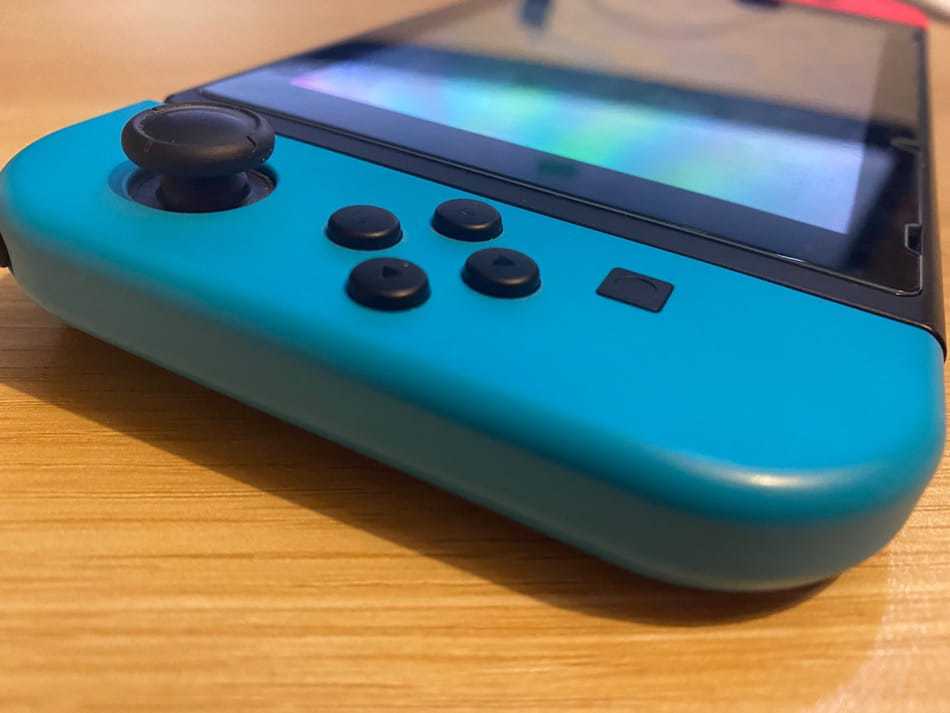
Hey everyone! I just wanted to let you know about a weird issue that I’ve been having with my Nintendo Switch. It seems like the left stick (the one with the A, B, X, and Y buttons) has become really sticky and difficult to use. I’m not sure if this is just me, but it definitely seems like something might be wrong with it. If anyone else is experiencing this problem, please let me know in the comments below!
Contents
- 1 The Problem: Sticky Buttons on the Nintendo Switch
- 2 The Solution: Use a Q-Tip
- 3 The Cause: Dust and Debris
- 4 How to Prevent It: Keep Your Switch Clean
- 5 When to Clean Your Switch: Regularly!
- 6 The Best Way to Clean Your Switch: With a Q-Tip
- 7 Other Ways to Clean Your Switch: With a Cloth
- 8 How to Keep Your Switch Clean: Regular Maintenance
The Problem: Sticky Buttons on the Nintendo Switch
Some Nintendo Switch users seem to have issues with the console’s buttons becoming sticky. This problem appears to be affecting both the Joy-Con controllers and the main Switch itself. Some users have even reported that their devices started experiencing this issue after only a few weeks of use.
So far, it seems like this is a relatively small problem, but it’s still something that Nintendo will need to address. In the meantime, here are a few things you can do if your Switch’s buttons start to become sticky:
1. Clean your Switch regularly. This will help prevent any dirt or grime build-up that could make the buttons sticky.
2. Avoid using your Switch in extreme temperatures. If it’s too hot or too cold, this can also cause the buttons to become sticky.
3. Be careful with what liquids you use near your Switch. If you spill anything on it, make sure to clean it up immediately and dry it off completely. Otherwise, the liquid could seep into the button mechanisms and cause them to malfunction.
4. Keep an eye on how often you’re using your Switch’s button inputs. If you find that they’re starting to feel less responsive, take a break from gaming for a little while and give them a chance to rest
The Solution: Use a Q-Tip
If you’re like most people, you probably think of Q-Tips as nothing more than cotton swabs on a stick. But did you know that there are actually many different uses for Q-Tips, including some that can be used to improve your gaming experience?
For example, have you ever had trouble getting those pesky coins out of a Nintendo game cartridge? A Q-Tip can help with that. Just insert the tip of the Q-Tip into the hole on the side of the cartridge and twist. The coin should come right out!
Q-Tips can also be used to clean hard-to-reach areas on your Nintendo console or controllers. Just lightly dampen the tip of the Q-Tip with water and run it along any areas that need cleaning. Be sure not to use too much water, as this could damage your electronics.
So next time you’re looking for a quick and easy way to clean your gaming equipment or get those pesky coins out of your cartridges, reach for a Q-Tip!
The Cause: Dust and Debris
If you’ve ever played a video game, you know that one of the most frustrating things can be when your console starts acting up. You’re in the middle of an intense battle or trying to beat a difficult level, and suddenly the game starts freezing or lagging. It’s enough to make even the most dedicated gamer throw their controller in frustration.
These problems often cause dust and debris that has built up inside the console over time. When dust accumulates on the internal components of your console, it can cause overheating and performance issues. The good news is that this problem has a relatively easy fix: simply clean out your console!
Here are some tips on how to clean your Nintendo console:
– Unplug the power cord from the back of the console.
– Remove any cartridges or discs from the system.
– Turn the console upside down and gently shake it to remove any loose dust particles.
– Use a soft, dry cloth to wipe down all visible surfaces, being careful not to press too hard as this could damage delicate parts. You can dampen the cloth with water or rubbing alcohol for tougher stains. Be sure not to get any liquid inside the system!
– Use compressed air to blow away any dust that’s accumulated in hard-to-reach places, such as around cooling vents or in between buttons.
– Once you’re finished cleaning, reassemble your console and plug it back in. Your games should now run more smoothly than ever before!
How to Prevent It: Keep Your Switch Clean
Your Nintendo Switch is a beautiful piece of technology- and like all beautiful things, it needs to be kept clean. Here are some tips on how to keep your Switch sparkling:
Use a soft, dry cloth to wipe down the console, Joy-Cons, and Pro Controller. Avoid using harsh chemicals or scrubbing too vigorously, as this could damage the delicate hardware.
For tougher stains, you can use a mild cleaning solution (like diluted dish soap) on a cloth or cotton swab. Again, be careful not to scrub too hard.
The kickstand that props up your Switch while you’re playing in Tabletop mode is especially prone to collecting dust and grime. Use a dry toothbrush or Q-tip to remove any buildup gently.
The same goes for the charging port and game card slot- use a dry toothbrush or Q-tip to get rid of any dirt or debris that might be preventing your accessories from connecting properly.
And there you have it! Here are a few simple steps to keep your Nintendo Switch looking as good as new.
When to Clean Your Switch: Regularly!
Your Nintendo Switch is a beautiful piece of machinery. It’s also a pretty sensitive one. That’s why it’s important to clean your Switch regularly, and not just when it starts to look dirty.
Cleaning your Switch will keep it in good condition and help ensure that the sensitive components inside are protected from dirt and dust. It’s also a good idea to clean your Switch if you’re having any problems with it, as dirt can sometimes cause issues.
So, how often should you clean your Switch? Well, that depends on how often you use it and where you keep it. If you use your Switch regularly and keep it in a relatively clean environment, it should be fine once every few months. However, if you live in a dusty environment or use your Switch heavily, then you may need to clean it more often.
There are two main ways to clean your Switch: the manual way and the automated way. The manual way involves using some basic cleaning supplies like alcohol wipes or cotton swabs dipped in rubbing alcohol. This method is perfectly safe and effective, but it does require some care and attention so that you don’t damage the delicate components inside the switch.
The automated way uses an ultrasonic cleaner like the ones used to clean jewelry. This method is much simpler as all you need to do is put your Switch in the cleaner, add some water, and let the machine do its job. However, this method is more expensive, so it’s only worth considering if you plan to clean your Switch frequently.
No matter which method you choose, make sure to unplug all cords and accessories from your Switch before starting any cleaning. Once everything is unplugged, begin by wiping down the outside of the console with a soft, dry cloth. If there are any stubborn marks or fingerprints, you can use a slightly dampened cloth (with water or rubbing alcohol ) to remove them gently.
Next, open up the kickstand at the back of the console and take a look at the exposed area inside. Use a dry cotton swab or toothpick to carefully remove any dirt or debris that may have accumulated here. Be careful not to damage anything while doing this! Also, be sure not to wipe too hard lest you risk taking off scratches from game cards being inserted too roughly over time.
Now for cleaning those pesky Joy-Cons! Start by removing them from the console itself; most people find it easiest to do this by pushing down on the release button located just above and between the shoulder buttons on each Joy-Con controller until they pop off easily into your hand(s). From here, remove any obvious dirt or debris by gently wiping them down with a soft cloth. If you see anything more stubborn, you can use the same slightly dampened cloth from earlier to rub it away gently. Just make sure not to use too much pressure or get them too wet as this could damage them beyond repair! Finally, once they’re looking reasonably clean, reconnect them to their rightful placeontheconsolebody
And that’s really all there is to basic Switch cleaning! By following these simple steps regularly, you can help keep your safe and functional for many years t
The Best Way to Clean Your Switch: With a Q-Tip
Assuming you’re referring to the Nintendo Switch, the best way to clean it is with a Q-Tip. You can use a cotton swab or even a toothpick to get in the crevices and clean off any dirt or grime. Be sure not to use anything too sharp, as you don’t want to scratch the console.
You can use a microfiber cloth or your sleeve to clean the screen. Gently wipe down the screen in a circular motion. If there are any smudges or fingerprints, you can use a little bit of water on the cloth to help remove them. Just be sure not to get the console itself wet.
And that’s all there is to it! A quick and easy way to keep your Switch looking like new.
Other Ways to Clean Your Switch: With a Cloth
Here are some other ways to clean your Nintendo Switch: With a Cloth.
1) Use a soft, dry cloth to wipe down the console. Avoid using harsh chemicals or abrasive materials, as these could damage the system.
2) If there are stubborn stains or smudges, you can dampen the cloth slightly with water. Be sure to wring out any excess moisture before wiping down the console.
3) For hard-to-reach areas, you can use a cotton swab or toothpick dipped in water (again, be sure to wring out any excess moisture before cleaning).
4) Once you’re finished cleaning, allow the console to air dry completely before powering it on again.
How to Keep Your Switch Clean: Regular Maintenance
Assuming you take your Nintendo Switch out of the house on a regular basis, it’s bound to get dirty. Here are some tips on how to keep it clean:
1. Use a soft, dry cloth to wipe down the console and Joy-Cons. Avoid using harsh chemicals or cleaners, as they could damage the finish or delicate internals.
2. If something is sticky or caked on, you can use a slightly dampened cloth (with water only) to lightly scrub it off. Be sure to dry the area thoroughly afterward.
3. The Switch’s kickstand is notorious for collecting dust and lint; gently use a cotton swab or toothpick to clean it out.
4. If your Joy-Con sticks are getting gunked up, you can remove them and blow into the crevices (being careful not to put too much force behind it). You can also use compressed air if you have some handy.
5. Lastly, don’t forget about the game cards! These can get just as dirty as everything else, so give them a quick wipe-down with a soft cloth before inserting them into the Switch
Amazon and the Amazon logo are trademarks of Amazon.com, Inc, or its affiliates.