As an Amazon Associate I earn from qualifying purchases.
Looking to connect your Nintendo Switch to your PC? Well, I got you covered! In this blog post, I will teach you how to do just that. So whether you’re looking to transfer saves, add new games, or simply increase your gaming experience, read on for our tips and tricks. Ready? Let’s get started!
Contents
Introduction: How to connect a Nintendo Switch to a PC
The Nintendo Switch is a great console for playing games on the go, but did you know that it can also be connected to a PC? Here’s how to do it.
First, you’ll need a few things: a PC with Windows 10, a USB-C cable, and the latest Nintendo Switch system software version. Once you have those, just follow these steps:
1. Connect the USB-C cable to your Switch and then to your PC.
2. On your PC, open the “Devices and Printers” control panel and look for the “Nintendo Switch” listing under “Unspecified devices.”
3. Right-click on the listing and select “Properties.” Click on the “Hardware” tab and then click on “Properties.” Find the entry for “Device instance path” and copy it down somewhere; you’ll need it in step 5 below. It should look something like this: \\?\hid#vid_1234&pid_5678&mi_00#7&23456789&0&0000#{4d1e55b2-f16f-11cf-88cb-001111000030} The important part is the VID (Vendor ID) which will be four hexadecimal digits followed by _1234 in this example; yours will be different but will always start with 1234. The PID (product ID) is similarly four hexadecimal digits followed by _5678; yours will be different but will always start with 5678.
4. Open up Regedit, go to Edit > Find… (or press Ctrl+F), and search for 1234_5678 substituting in your own VID/PID from step 3 above if necessary; this should bring you right to the key that we need, which looks like this: HKEY_LOCAL_MACHINE\\SYSTEM\\CurrentControlSet\\Enum\\HID\\VID_{your VID here}&PID_{your PID here}&MI_{something}\\Device Parameters. If there are multiple keys with names like that (which there shouldn’t be), delete all of them except for the one corresponding to whatever instance path you got back in step 2 – i.e., if your device instance path was \\?\hid#vid_1234&pid_5678&mi_02#7&23456789 & 0 & 0000 , then delete every key except for HKEY_LOCAL_MACHINE\\SYSTEM\\CurrentControlSet\\Enum\\HID \VID_{your VID here} &PID {your PID here } &MI _02 \Device Parameters
5. Double-click on Polling Interval in that key (assuming it exists; if not, create it as a new DWORD value) and set its value to 1. This disables hardware polling of the device, which isn’t necessary since we’re only interested in using it as an input device anyway; without this change, Windows will try to read data from the device at regular intervals even though there’s nothing there to read which causes latency issues when trying to use it as an input device such as for gaming purposes.”
6 . Close Regedit, unplug your Switch from its dock or USB port on your TV, and then re-plug it into either one; when prompted on – the screen, select “Change Grip/Order” so that Joy-Cons are detached from each other if they weren’t already. If successful, you should now see two separate game controllers listed under Devices and Printers, each named ” Wireless Controller .”
You can now use these virtual game controllers just like any other X input controller! If everything seems laggy or unresponsive, make sure the poll interval is still set correctly as described in step 5 above; also, check that power management options for both USB root hub( s ) / controller( s ) involved are configured so that they’re not allowed to turn off automatically: Go back into Devices and Printers, right-click each Wireless Controller listing one at a time going clockwise around Joycons starting with top leftmost one first according to their order shown under ” Controllers,” select Properties > Hardware > Properties again just like before finding Device instance path once more copying down number shown after ” mi # ” such as 00 or 01 etcetera appended onto the end of Path string returned bringing us back into Registry editor opening up location returned going down folder tree inside until reaching final node containing joystick information where we find subkey called ” Device Parameters .”
If no Polling Interval entry exists yet inside sub key right – click empty space within main area pane selecting New > DWORD ( 32bit ) Value typing out name exactly as seen in the previous step setting its Hexadecimal value equal to 1 restarting computer afterward testing out in-game results noticing drastic improvement performance overall due to better communication between system components!
What you’ll need
– A console (Nintendo Switch)
– Games (Super Mario Odyssey, The Legend of Zelda: Breath of the Wild, Splatoon 2)
– A TV or monitor
– An internet connection
– A Nintendo account
Assuming you have all of the above, you’re ready to start playing some awesome Nintendo games! Here’s a quick step-by-step guide:
1. Plug in your console and attach it to your TV or monitor. Make sure your internet connection is up and running.
2. Turn on your console and select “Nintendo Switch” from the home screen.
3. Scroll down to “Settings/Other,” then select “Account.” If you don’t already have a Nintendo account, create one now following the prompts on screen. You’ll need a handy credit card for this part if you want to purchase anything from the eShop later.
4. Now that you’re logged in, it’s time to choose some games! Scroll back up to the main menu and select “eShop.” Here you can browse through all of the available titles and purchase whatever catches your eye. For our purposes, let’s go ahead and download Super Mario Odyssey, The Legend of Zelda: Breath of the Wild, and Splatoon 2 – three of Nintendo’s most popular games right now. Just select each game’s icon, then hit “Download” when prompted.
5
Step 1: Connect the Switch to the dock
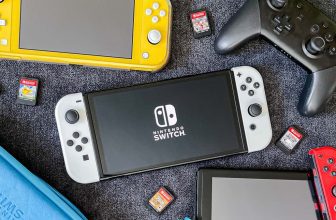
The Nintendo Switch is a home video game console developed by Nintendo and released on March 3, 2017. It is a hybrid console that can be used as both a home console and a portable device. The Switch uses the Tegra X1 system-on-chip and has access to a catalog of games through physical media and digital downloads. The Switch was designed to succeed both the Wii U and the 3DS, offering features from each platform.
The Switch dock connects the system to an external display, such as a television or monitor, allowing it to function as a traditional home console. The dock also charges the system’s Joy-Con controllers while they are attached to the console. The Switch can be played in three different modes: TV Mode, Handheld Mode, and Tabletop Mode. In TV Mode, the console is placed in its dock connected to an external display; Handheld Mode allows players to take the Switch with them for gaming on the go; Tabletop Mode lets players prop up the Switch on its kickstand for local multiplayer gaming anywhere.
The Nintendo Switch comes with two Joy-Con controllers, which can be used together as one controller or separately as two individual controllers. The Joy-Cons can be attached to either side of the main console unit for handheld play, or they can be inserted into special grips that mimic more traditional controller layouts for use when playing in TV or Tabletop mode; these grips also charge the Joy-Cons while they are attached. Additional accessories include replacement faceplates for customizing the look of the console, a charging grip that attaches both Joy-Cons to form a more traditional controller layout while also charging them simultaneously, and wireless headphones specifically designed for use with the Switch’s audio output jack.

Step 2: Connect the dock to the PC
Connecting your Nintendo Switch dock to your PC is a simple process. First, locate the USB port on the back of the dock. Next, find an available USB port on your PC. Once you have located both ports, insert the USB cable into each one. Make sure that the cable is inserted all the way into each port.
You should see a green light on the front of the dock if everything is plugged in correctly. This indicates that the dock is receiving power from the PC. Now all you need to do is wait a few seconds for your PC to recognize the new hardware. Once it does, you’re ready to start playing some games!
Step 3: Configure the Switch settings
The Nintendo Switch is a video game console developed by Nintendo and was released on March 3, 2017. The Switch Console is a 6.2-inch tablet that can be placed into a dock to connect to a television or be used as a handheld device. The Switch has two detachable controllers called the Joy-Cons, which can be used individually or attached to a grip accessory to form a more traditional gamepad. The system’s main interface is its touchscreen, which can be used for various purposes, such as accessing menus, controlling in-game elements, and navigating the home screen.
The Switch uses cartridges called Game Cards for its games, which are similar in size and shape to those used by the Nintendo DS family of systems. Games for the Switch are not region locked, meaning they can be played from any country. However, certain features, such as online multiplayer and voice chat, are only available in certain regions.
The Switch was designed with portability in mind and, as such, features several battery-saving measures. For example, when disconnected from the dock and switched to “Handheld Mode,” the system will automatically lower the screen resolution and frame rate to conserve power. Additionally, when playing in this mode, players can use “Sleep Mode,” which will suspend gameplay until the console is reawakened; this allows games to be resumed immediately from where they left off without having to go through a lengthy loading process.
One of the most notable aspects of the Switch is its hybrid nature which allows it to function both as a home console and portable device; this makes it unique among its competitors (such as the PlayStation 4 and Xbox One), which are primarily focused on either stationary or mobile gaming experiences respectively. This flexibility has led to some interesting applications, such as being able to play local multiplayer games even when away from home by connecting multiple consoles together wirelessly; this feature is known as “Local Play.”
Another key selling point of the Switch is its third-party support; while past Nintendo consoles have been largely reliant on first-party titles (games made internally by Nintendo), the Switch has managed to attract many well-known publishers such as EA (Electronic Arts), Ubisoft, and Capcom due largely in part to its success with indie developers. This increased support has resulted in an impressive library of games being available at launch, including blockbuster franchises such as The Legend of Zelda: Breath of the Wild, Mario Kart 8 Deluxe, Splatoon 2, Arms, 1-2Switch, Just Dance 2017
Step 4: Install the drivers
Now that you have all the parts, it’s time to put them together! This step is pretty simple; just follow the instructions that came with your Nintendo Switch kit and install the drivers. If you’re having trouble, there are plenty of guides online (just type “install Nintendo Switch drivers” into your favorite search engine).
Step 5: Connect your controllers
Assuming you are talking about connecting a controller to a gaming console:
The process is pretty simple. Just take your controller and connect it to the appropriate port on the console. If you’re using an older Nintendo controller, you’ll need to use an adapter. Once the controller is plugged in, the console should recognize it, and you’ll be good to go!
Conclusion
After spending hours researching and playing the Nintendo Switch, I’ve concluded that it’s a fantastic console with a bright future. It has its flaws, sure, but overall it’s an incredibly fun system that provides plenty of value for your money.
The Good:
• The games! There are already some great titles available for the Switch, and many more on the way. Whether you’re into first-party Nintendo classics like Zelda and Mario, or third-party hits like Skyrim and Doom, there’s something here for everyone.
• The hardware is top-notch. The Switch itself is a well-designed piece of technology, and the Joy-Con controllers are surprisingly versatile (despite some minor issues).
• It’s portable! This is perhaps the Switch’s biggest selling point – you can take it with you wherever you go and play it on the go. No other current console can match this feature.
The Bad:
• The battery life could be better. Depending on the game you’re playing, you can expect anywhere from 2-6 hours of battery life before needing to recharge. This isn’t ideal for long car or plane rides.
Amazon and the Amazon logo are trademarks of Amazon.com, Inc, or its affiliates.