As an Amazon Associate I earn from qualifying purchases.
Contents
- 1 Do Nintendo Fix Joycons for Free?
- 2 How to get your Joy-Cons fixed for free
- 3 How to contact Nintendo about your Joy-Cons
- 4 What to do if your Joy-Cons are not working
- 5 How to fix Joy-Con drift
- 6 How to clean your Joy-Cons
- 7 What to do if your Joy-Cons are not responding
- 8 How to reassemble your Joy-Cons
- 9 How to prevent Joy-Con drift
Do Nintendo Fix Joycons for Free?
Apparently, Nintendo Switch owners are in luck! According to reports, the company is offering to fix any faulty joycons for free. This offer is apparently good through March of next year. So if you’ve been having trouble with your controllers, now might be a great time to take advantage of this offer!
How to get your Joy-Cons fixed for free
If your Joy-Cons are giving you trouble, don’t despair! There is a way to fix them for free.
First, try resetting the Joy-Cons by pressing and holding the small button on the back of each controller for about 20 seconds. If that doesn’t work, then you can try recalibrating them. To do this, go into the Settings menu on your Switch and select “Controllers and Sensors.” Then scroll down and select “Calibrate Control Sticks.” Follow the prompts to calibrate your controllers.
If neither of those solutions works, then you’ll need to contact Nintendo customer support. They will likely ask you to send in your controllers for repair or replacement. But don’t worry, this service is free of charge!
How to contact Nintendo about your Joy-Cons
If your Joy-Cons are giving you trouble, you can do a few things before contacting Nintendo. First, try restarting the console and recalibrating the controllers. You may need to update the console’s software or firmware if that doesn’t work. You can check for updates by going to System Settings > System > Update Software. Finally, if none of these solutions fix the problem, you can contact Nintendo’s customer support team for assistance.
To reach Nintendo’s customer support team, you can call 1-800-255-3700 or visit their website at support.nintendo.com. When speaking with customer service, be sure to have your console’s serial number ready, as they will likely ask for it.
What to do if your Joy-Cons are not working
If you’re having problems with your Nintendo Switch Joy-Cons, there are a few things you can try to get them working again. First, make sure that the Joy-Cons are properly attached to the console. If they’re not, they may not be able to communicate with the console properly.
Next, try resetting the Joy-Cons by pressing and holding the small button on the back of each one for about 15 seconds. This will restart them and hopefully fix any communication issues.
If your Joy-Cons still aren’t working after that, you can try connecting them to a different Switch console or using a different set of Joy-Con controllers. This will help rule out any hardware issues with your particular console or controllers.
Finally, if nothing else is working, you may need to contact Nintendo support for further assistance.
How to fix Joy-Con drift
The Nintendo Switch is a great console, but it’s not without its issues. One of the most common problems faced by Switch owners is Joy-Con drift.
Joy-Con drift is when the analog sticks on the Joy-Cons start registering input even when they’re not being touched. This can be extremely frustrating, especially if you’re in the middle of a game.
There are a few different ways to fix Joy-Con drift, and we’ve outlined some of the most effective ones below.
1. Clean your analog sticks
One of the simplest things you can do to fix Joy-Con drift is to clean your analog sticks. Over time, dust and debris can build up on the sticks and cause them to register input when they shouldn’t.
To clean your analog sticks, simply use a cotton swab or Q-tip dipped in rubbing alcohol and gently wipe around the stick. Be sure not to get any alcohol on the plastic housing around the stick, as this could damage it. If you don’t have to rub alcohol handy, you can also use distilled water. Just be sure to dry off the stick completely afterward with a lint-free cloth before putting them back on your Switch. Try doing this once every few months to help keep your Joy-Cons functioning properly.
2. Recalibrate Your Analog Sticks If cleaning your analog sticks doesn’t fix your issue, you may need to recalibrate them. This can be done either in software or hardware, depending on which method you prefer. In order to recalibrate y our Joy-Cons using software, simply go into the settings menu of y our Swit ch and navigate to” Controllers and Sensors .” From here, select “Calibrate Control Sticks” and follow the prompts. If this doesn’t t work for you or if you prefer the hardware method, you can also recalibrate using the Joy-Con Dift Fix Tool Kit available from various retailers online. This process is a bit more involved, but can be very effective at fixing J oy – Con drif
How to clean your Joy-Cons
Assuming you’re inquiring about how to clean the exterior of your Joy-Cons, and not the interior (which we don’t recommend unless you know what you’re doing), there are a few easy steps to follow.
First, grab a microfiber cloth and some rubbing alcohol. Gently wipe down the exposed areas of your Joy-Cons with the cloth, being careful not to press too hard or scrub too vigorously. You should see any dirt or grime coming off the cloth.
Once you’ve wiped down the visible areas, flip your Joy-Cons over and repeat the process on the backside. Again, be gentle so as not to damage the delicate electronics inside.
If your Joy-Cons are still looking dirty after a once-over with the microfiber cloth, dip a cotton swab in some rubbing alcohol and use it to target specific spots. Just be sure not to get any liquid inside the Joy-Con itself!
With a little bit of care and elbow grease, your Joy-Cons will be sparkling clean in no time!
What to do if your Joy-Cons are not responding
If you’re having trouble with your Joy-Cons not responding, you can try a few things. First, make sure they are properly charged. If they are, then try restarting your Nintendo Switch. If that doesn’t work, you may need to recalibrate your Joy-Cons. You can do this by going into the Settings menu and selecting “Controllers and Sensors.” Select “Calibrate Control Sticks” from there and follow the on-screen instructions.
How to reassemble your Joy-Cons
Your Joy-Cons are the key to your Nintendo Switch gaming experience, so keeping them in good working order is important. If you ever need to disassemble your Joy-Cons for any reason, here’s a quick guide on how to reassemble them.
1. Start by locating all of the parts you’ll need: the left and right Joy-Con controllers, the shoulder buttons, and the Joy-Con straps. Make sure you have all of these before proceeding.
2. Begin by attaching the shoulder buttons to the back of each Joy-Con controller. There are small pegs on the shoulders that line up with holes on the back of the controllers. Just press them together until they click into place.
3. Next, take one of the controllers and insert one end of a strap into the hole near the bottom edge of the controller. You may need to use a bit of force to get it started, but be careful not to break anything. Once you have it started, just pull it through until it’s tight against the other side of the controller. Repeat this step for the other controller and both straps.
4. Finally, reattach each Joy-Con controller to either side of the Nintendo Switch console itself. They should snap securely into place; if they don’t feel like they’re clicked in all, Check out our other blog post on how way Nintendo Switch each works together joyfully!
How to prevent Joy-Con drift
One of the most common complaints with the Nintendo Switch is Joy-Con drift. This is when your Joy-Cons start to register input even when you’re not touching them. It’s a frustrating problem that can ruin your gameplay experience, and it seems to be affecting more people as time passes.
Luckily, there are some things you can do to try and prevent Joy-Con drift from happening in the first place. Here are a few tips:
1. Keep your Joy-Cons clean
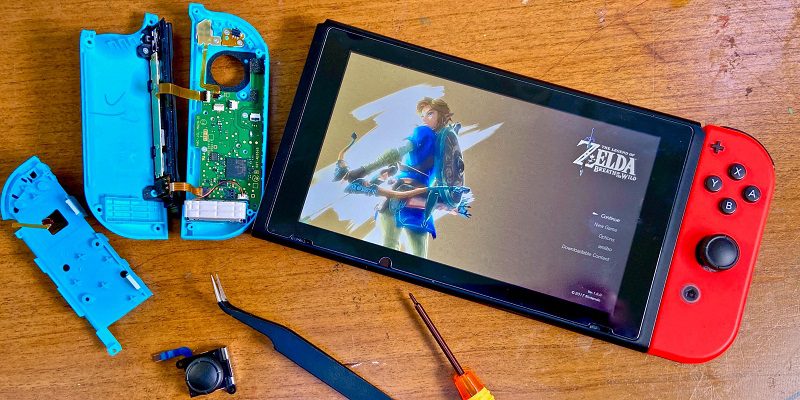
One potential cause of Joy-Con drift is dirt or grime buildup on the analog sticks. This can happen if you play games in dusty environments or if you don’t clean your Joy-Cons regularly. You’ll need to remove the analog sticks using a small Phillips head screwdriver to clean your Joy-Cons. Be careful not to lose the tiny springs that are attached to the sticks! Once removed, use a cotton swab dipped in rubbing alcohol to wipe down the sticks and their housing gently. Allow them to dry completely before reassembling and using them again.
2. Avoid excessive force when pressing buttons
Another possible cause of Joy-Con drift is physical damage to the button contacts inside the controllers. This can happen if you press buttons too hard or if something sharp comes into contact with the buttons (like keys in your pocket). To avoid this type of damage, be gentle when pressing buttons and avoid storing your Joy-Cons with anything that could potentially scratch them up.
3. Use official accessories from Nintendo
Nintendo offers two types of charging docks for Switch – one made by Hori and one made by PowerA. Both are good choices, but we recommend sticking with official accessories whenever possible to avoid any compatibility issues.
4. Take advantage of the warranty.
If your-Con drifts less than a year after purchase, The good news is that Nintendo will fix it for free! Just be aware that they may require proof of purchase, so hang onto those receipts.
5. Try adjusting sensitivity settings.
In some cases, You may be able to mitigate joystick drift by adjusting the sensitivity settings. In ‘The Legend of Zelda: Breath of The Wild,’ for example, There’s an option called “Stick Sensitivity” under Controller Settings that lets you adjust how sensitive The game registers input from The left and right analog sticks. Experiment with different settings until you find one that feels comfortable.
6. Use compressed air
If cleaning doesn’t work, You may need to open up your controller And blow some compressed air Into it To remove any dust or debris That’s causing problems.
7. Calibrate Your Controller.
Sometimes all you need To do Is recalibrate Your Controller To get rid Of joystick drift. In ‘Breath Of The Wild,’ For example, You can access The calibration tool By going Into Options > Controller Settings > Calibrate Control Sticks.
Amazon and the Amazon logo are trademarks of Amazon.com, Inc, or its affiliates.